Posted on Leave a comment

How to Get Clean Line Art in Procreate: 7 Beginner Tips

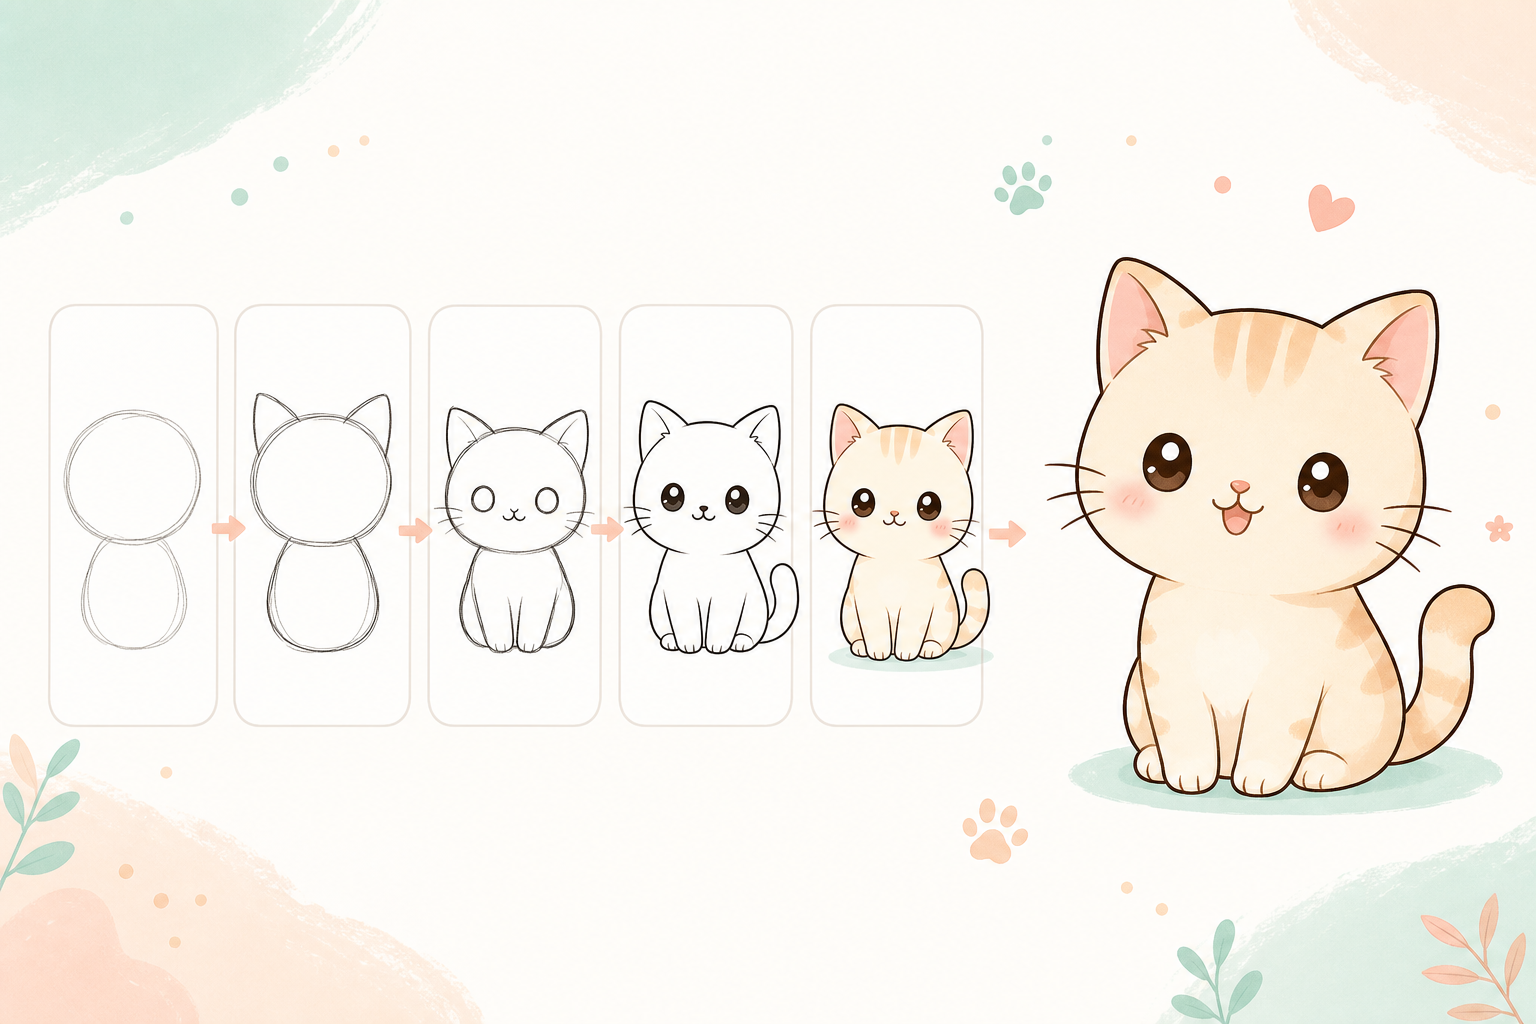
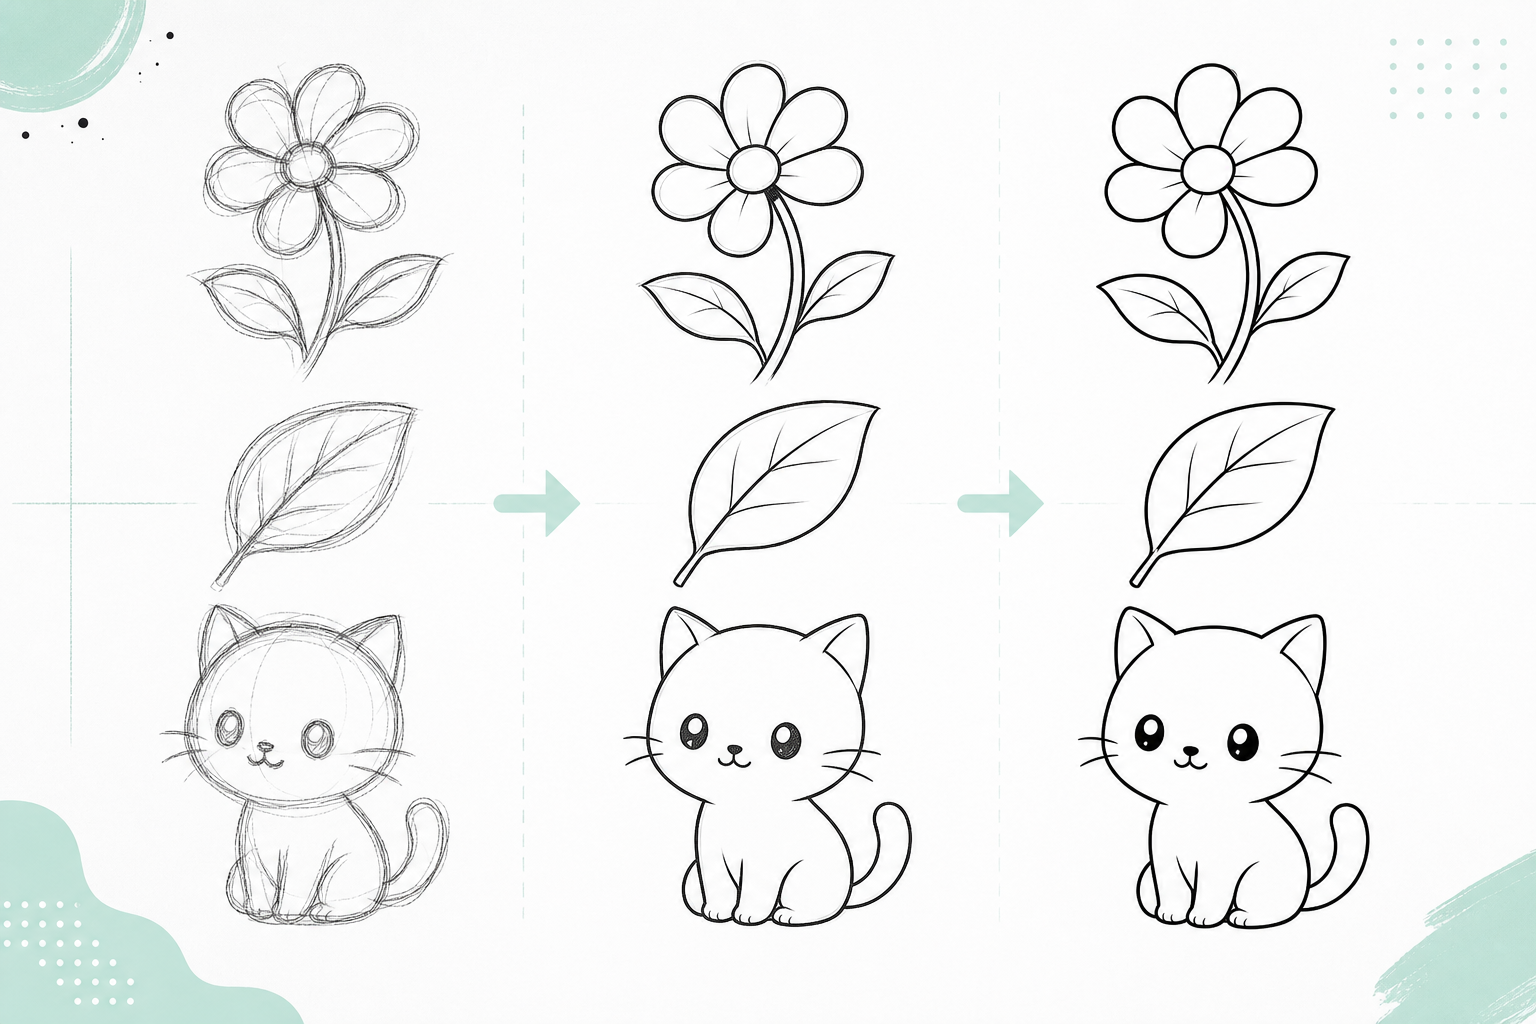
Procreate clean line art tutorial showing sketch to final line art

Clean line art is not about having a perfect hand. It comes from simple shapes, smart layers, and a brush setup that supports your natural drawing motion.

1. Sketch on a Separate Layer

Keep your rough sketch on its own layer. When the sketch and final line art are separated, you can edit freely without damaging your final drawing.

2. Lower Sketch Opacity

Set your sketch layer opacity to around 20-30%. This makes it easier to see your final line without visual clutter.

3. Use Longer Confident Strokes

Instead of building one line with many tiny strokes, try drawing longer strokes with your whole wrist or arm. Undo and redraw until the curve feels clean.

4. Turn on Stabilization

If your lines shake, adjust StreamLine or Stabilization in your brush settings. Use enough help to smooth the line, but not so much that it feels hard to control.

5. Zoom Less Than You Think

Zooming in too much can make your lines look stiff. Work at a comfortable zoom level so your strokes stay natural.

6. Clean Intersections Last

Do not erase every tiny mistake while drawing. Finish the big shapes first, then clean corners, overlaps, and line endings.

7. Practice Simple Shapes

Circles, leaves, ribbons, and simple animals are great line art exercises. Clean lines improve faster when the subject is simple.

Beginner tip: line confidence matters more than line perfection.

Posted on Leave a comment

Easy Face Shading in Procreate for Beginners

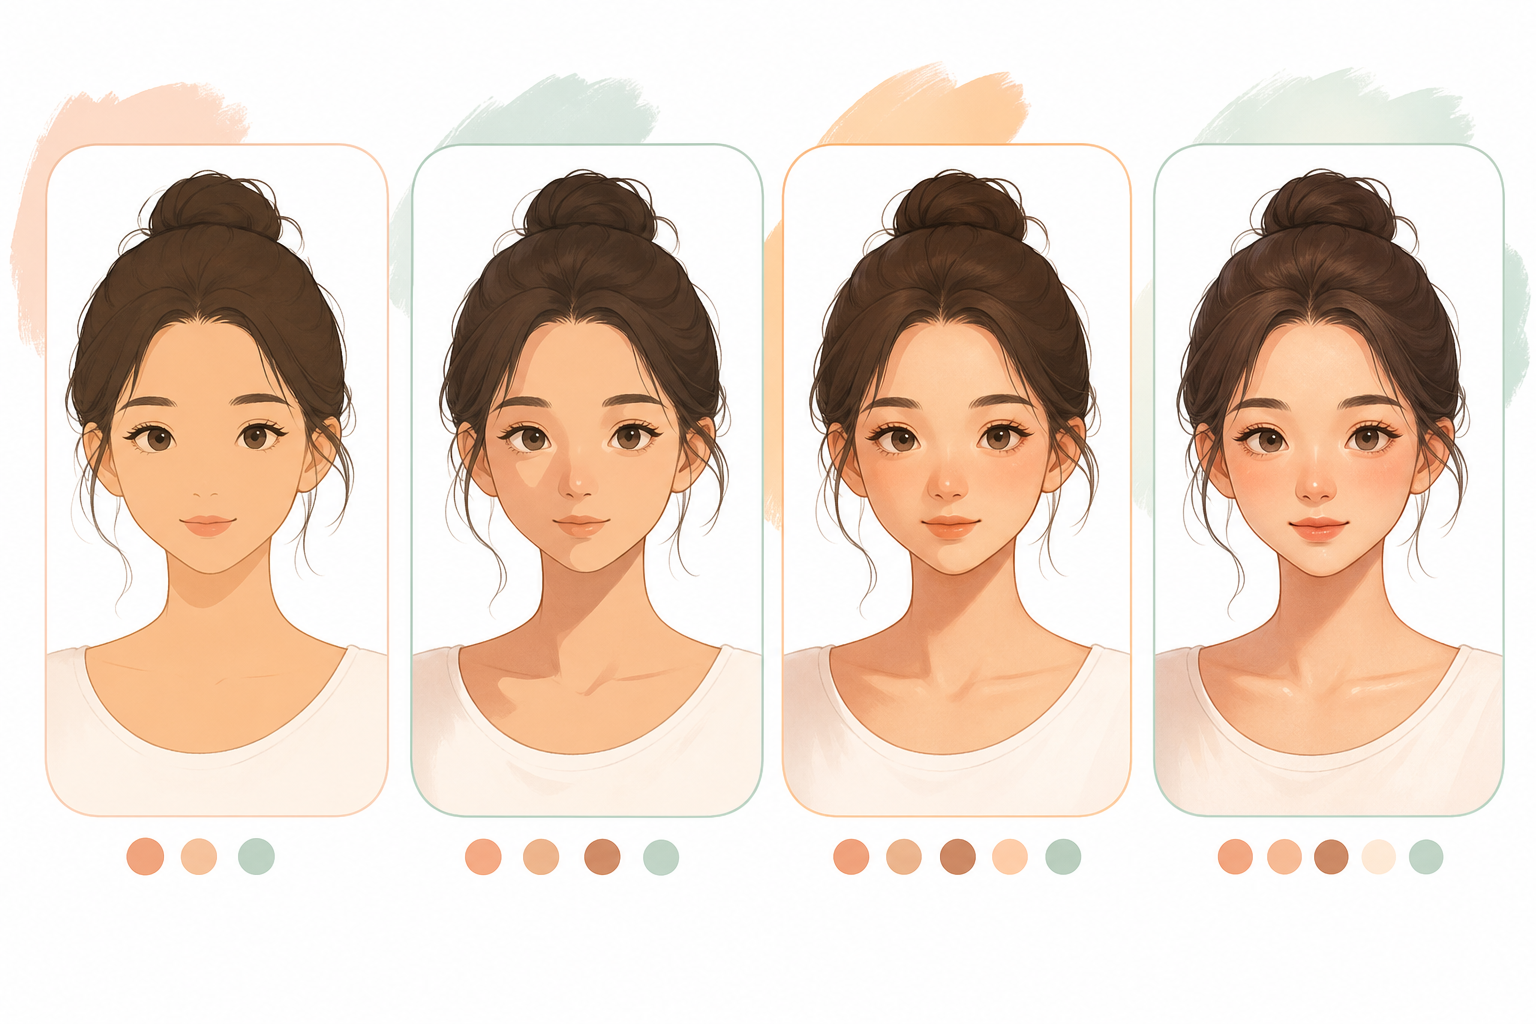
Beginner Procreate face shading tutorial with four shading stages

Face shading can feel complicated, but you can make it beginner-friendly by using one Multiply layer, soft shadows, and a few clear shadow zones.

Step 1: Add a Base Skin Color

Fill the face with a flat base color. Keep it simple before adding shadows.

Step 2: Create a Multiply Layer

Create a new layer above the base color and set the blend mode to Multiply. This lets you build natural shadows without repainting the whole face.

Step 3: Place the Main Shadows

  • Under the hair
  • Under the nose
  • Under the lower lip
  • Under the chin
  • On the side of the face away from the light

Step 4: Soften the Edges

Use a soft brush or gently lower opacity. Beginner shading usually looks better when shadows are subtle.

Step 5: Add Highlights

Add small highlights on the nose, cheeks, lower lip, and forehead. Keep them light and minimal.

Beginner tip: use fewer shadows first. You can always add more, but heavy shading is harder to fix.

Posted on Leave a comment

Apple Pencil Tips for Drawing: Original, Soft, and Metal Tips Compared

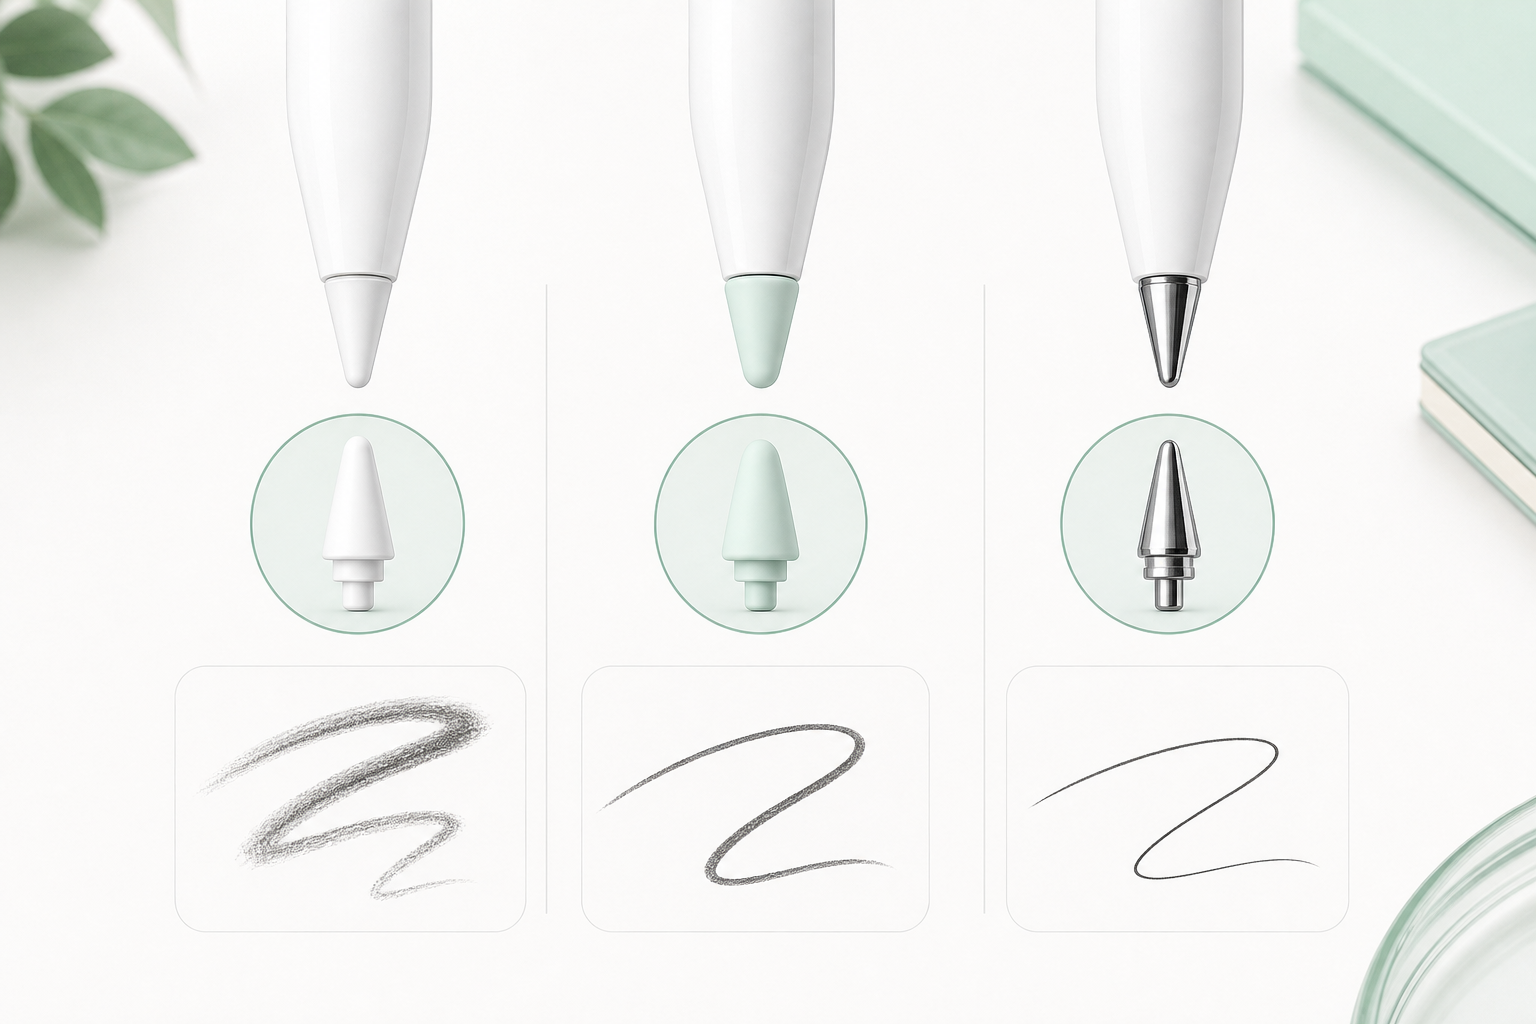
Comparison of Apple Pencil compatible tips for drawing and line control

Apple Pencil tips can change how drawing feels in Procreate. The best choice depends on whether you care more about smoothness, control, quiet drawing, or precise line work.

Original Apple Pencil Tip

The original tip feels smooth and balanced. It is a good default option for sketching, coloring, and everyday drawing.

Soft Silicone Tip

A soft tip can feel quieter and more controlled, especially if your iPad screen feels too slippery. It is comfortable for long sketching sessions.

Metal Tip

A metal-style tip can feel more precise for line art, lettering, and detailed strokes. It is often preferred by artists who want a sharper pencil-like response.

Which Tip Should Beginners Choose?

If you are new to Procreate, start with a comfortable tip that helps you draw slower, cleaner strokes. If your lines feel slippery, try a different tip or a paper-feel screen protector.

Posted on Leave a comment

Do You Need a Shortcut Keyboard for Procreate?

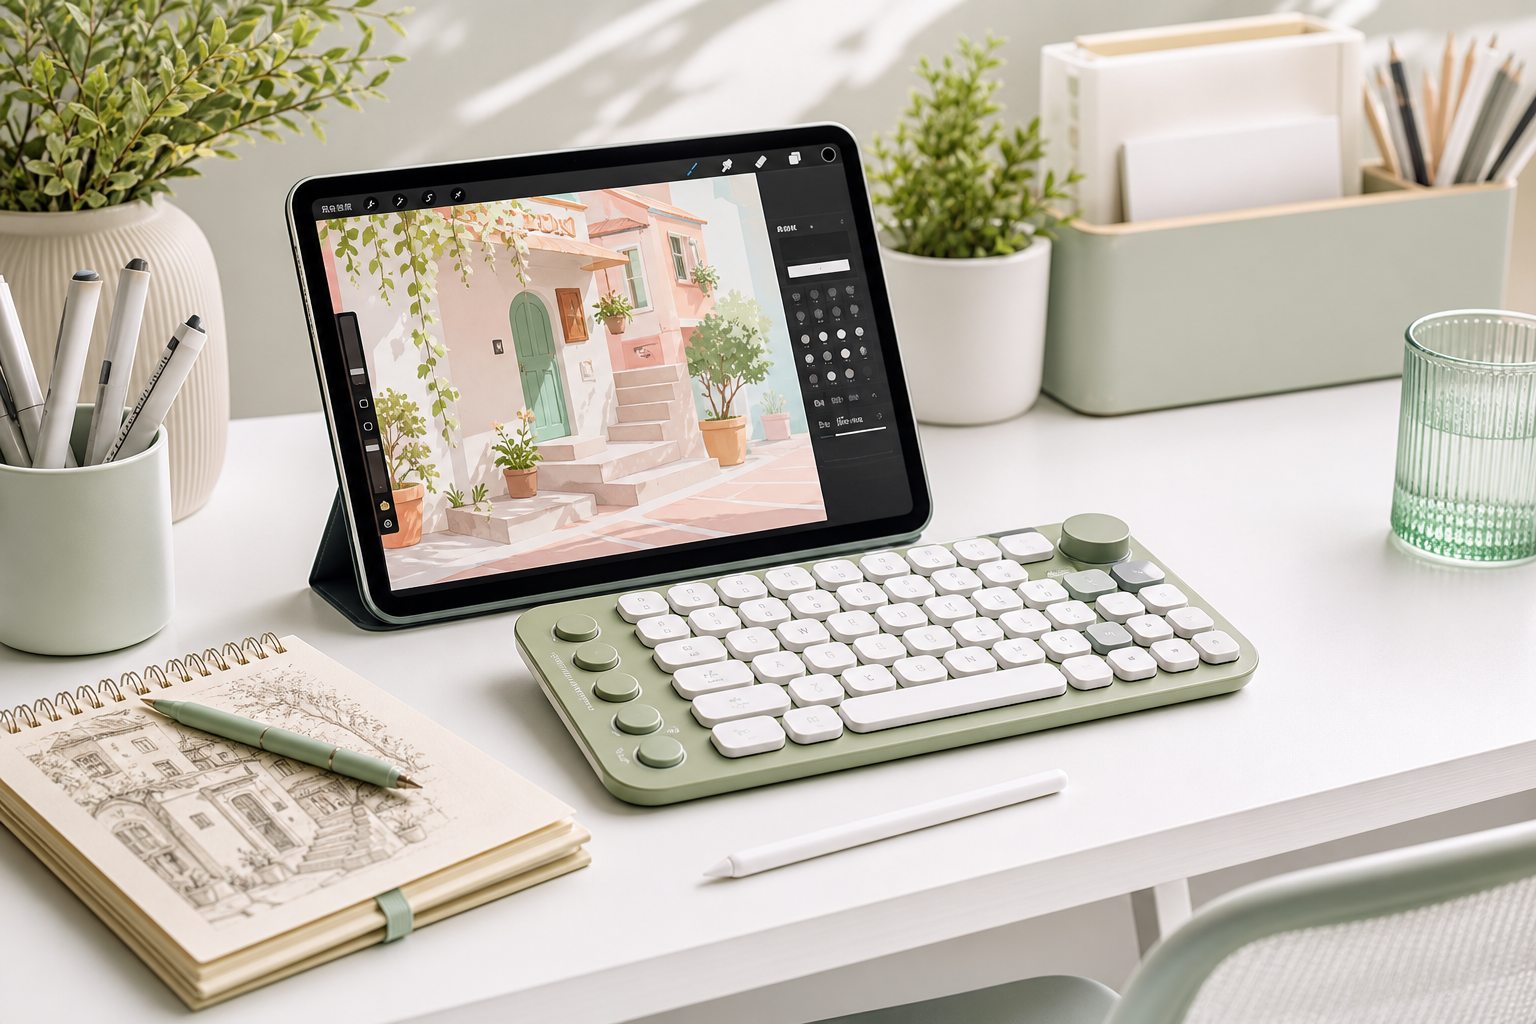
iPad Procreate drawing setup with shortcut keyboard and Apple Pencil

A Procreate shortcut keyboard is not required for every artist, but it can make drawing faster and more comfortable if you use Procreate often.

What a Shortcut Keyboard Helps With

  • Undo and redo
  • Switching between brush and eraser
  • Changing brush size quickly
  • Zooming and rotating the canvas
  • Managing layers faster
  • Coloring with fewer screen taps

Who Should Use One?

If you draw casually once in a while, you may not need a shortcut keyboard. If you draw every day, make client work, or create content, shortcuts can save time and reduce hand movement.

Beginner Workflow Example

Try assigning your most-used actions first: undo, redo, brush, eraser, color picker, and layer menu. Keep the setup simple until the shortcuts become natural.

Beginner tip: a shortcut keyboard works best when it removes repeated taps, not when it makes your setup complicated.

Posted on Leave a comment

How to Draw a Cute Cat in Procreate: Easy Beginner Tutorial

Step-by-step cute cat drawing tutorial in Procreate

Drawing a cute cat in Procreate is much easier when you break the character into simple shapes. This beginner-friendly tutorial is made for iPad artists who want a quick, relaxing practice project.

What You Need

  • iPad with Procreate
  • Apple Pencil or compatible stylus
  • A clean sketch brush and a soft coloring brush
  • One separate layer for sketch, line art, color, and shadows

Step 1: Start With a Round Head

Draw a large circle for the cat’s head. Keep it soft and round. Cute characters usually feel friendlier when the shapes are simple and slightly oversized.

Step 2: Add Soft Triangle Ears

Add two triangle ears on top of the head. Round the corners a little so they do not look too sharp.

Step 3: Draw the Face

Add two big round eyes, a tiny nose, and a small w-shaped mouth. Place the features slightly lower on the face to make the cat look cuter.

Step 4: Sketch the Body and Paws

Draw a small oval under the head. Add four tiny paws with short rounded lines. The body should be smaller than the head for a cute cartoon proportion.

Step 5: Add the Tail

Draw a curved tail behind the body. A smooth C-shaped tail works well for beginner drawings.

Step 6: Clean the Line Art

Lower the sketch layer opacity to about 25%. Create a new layer above it and trace your final line art with confident strokes.

Step 7: Color and Add Details

Create a color layer under your line art. Fill the cat with cream, gray, orange, or any soft pastel color. Add blush, whiskers, eye highlights, and a small shadow under the body.

Beginner tip: keep every line rounded. Soft shapes make simple drawings look more polished.

If your Apple Pencil feels too slippery, try a paper-feel screen protector or a different pencil tip for better control.