Posted on Leave a comment

5 Easy Procreate Drawing Ideas for Beginners

Step-by-step strawberry drawing tutorial in Procreate

If you are new to Procreate, the fastest way to improve is to draw small, clear subjects. These ideas are simple enough for beginners but still useful for practicing shape, color, and line control.

1. Cute Fruit

Try strawberries, lemons, peaches, cherries, or orange slices. Fruit teaches you color gradients, highlights, and soft shadows.

2. Simple Animals

Cats, rabbits, bears, and birds are good practice because they can be built from circles and ovals.

3. Leaves and Flowers

Botanical shapes are ideal for clean line art and brush control.

4. Desk Objects

Draw your Apple Pencil, notebook, keyboard, or iPad stand. These objects help you practice simple perspective.

5. Small Icons

Practice tiny icons like stars, hearts, clouds, pencils, and fruit slices. This improves consistency.

Posted on Leave a comment

How to Practice Clean Line Art for 10 Minutes a Day

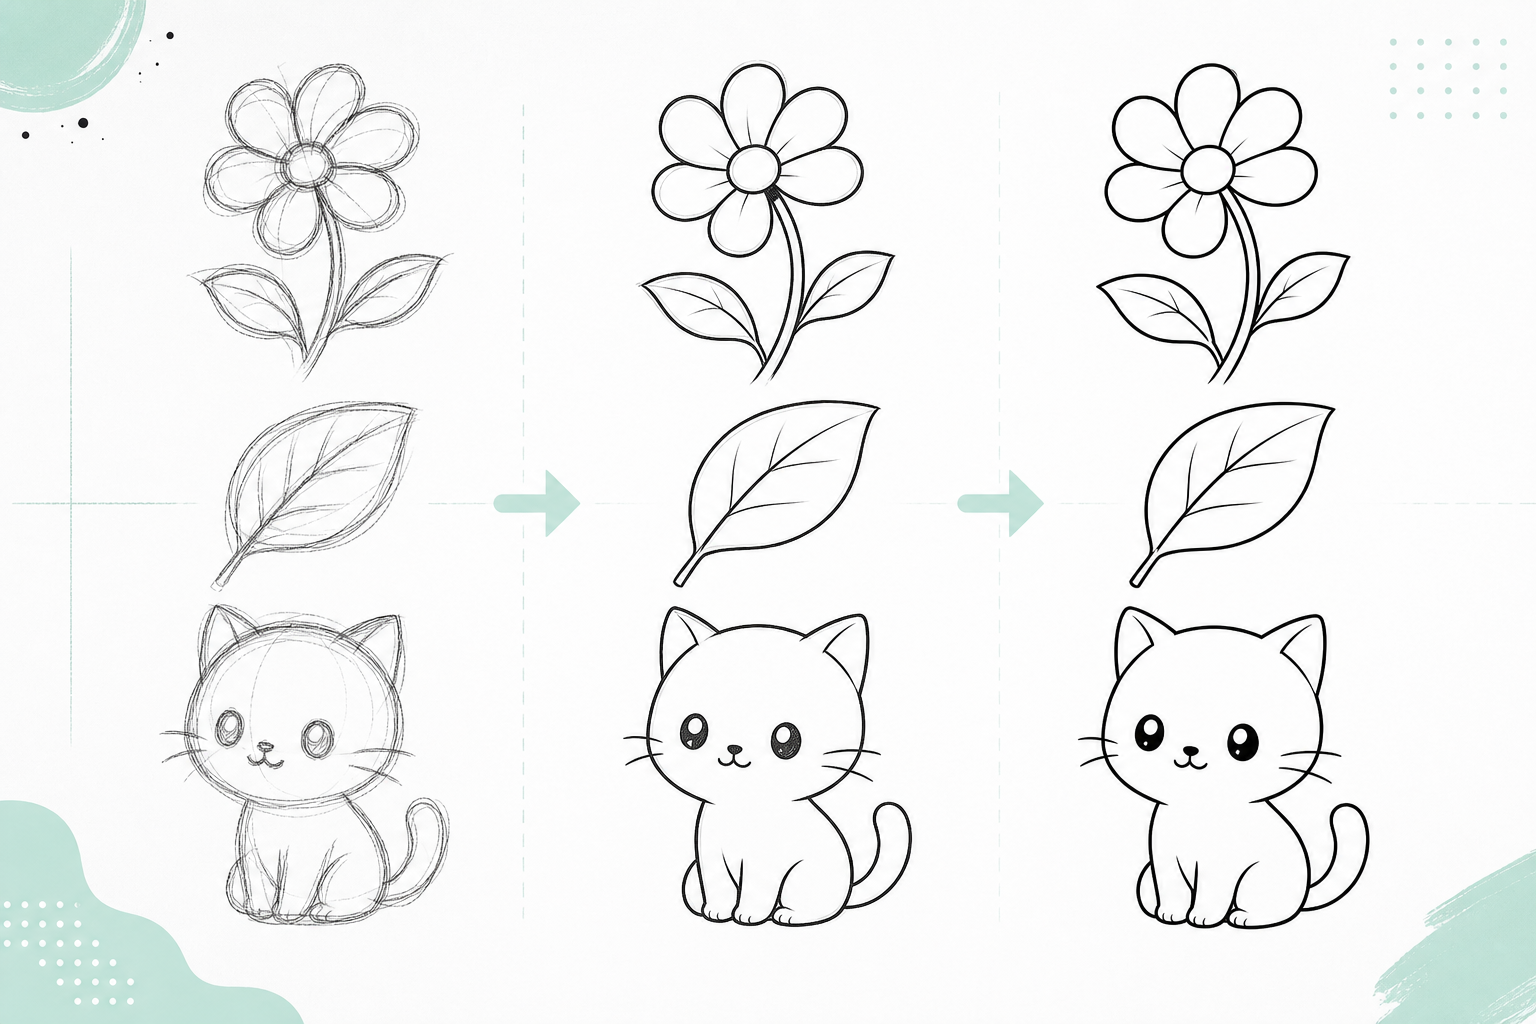
Procreate clean line art tutorial showing sketch to final line art

Clean line art improves faster when you practice a small routine every day. You do not need a long session. Ten focused minutes is enough.

Minute 1-2: Warm Up With Curves

Draw long C-curves, S-curves, and circles. Focus on smooth motion instead of perfect results.

Minute 3-5: Trace Simple Shapes

Sketch a leaf, flower, or fruit shape, lower the opacity, then trace it on a new layer.

Minute 6-8: Redraw Without Tracing

Hide the sketch and redraw the same object from memory. This builds confidence.

Minute 9-10: Clean the Edges

Erase overlaps, fix corners, and adjust line weight. Keep the routine simple and repeatable.

Posted on Leave a comment

Apple Pencil Tips for Sketching, Line Art, and Coloring

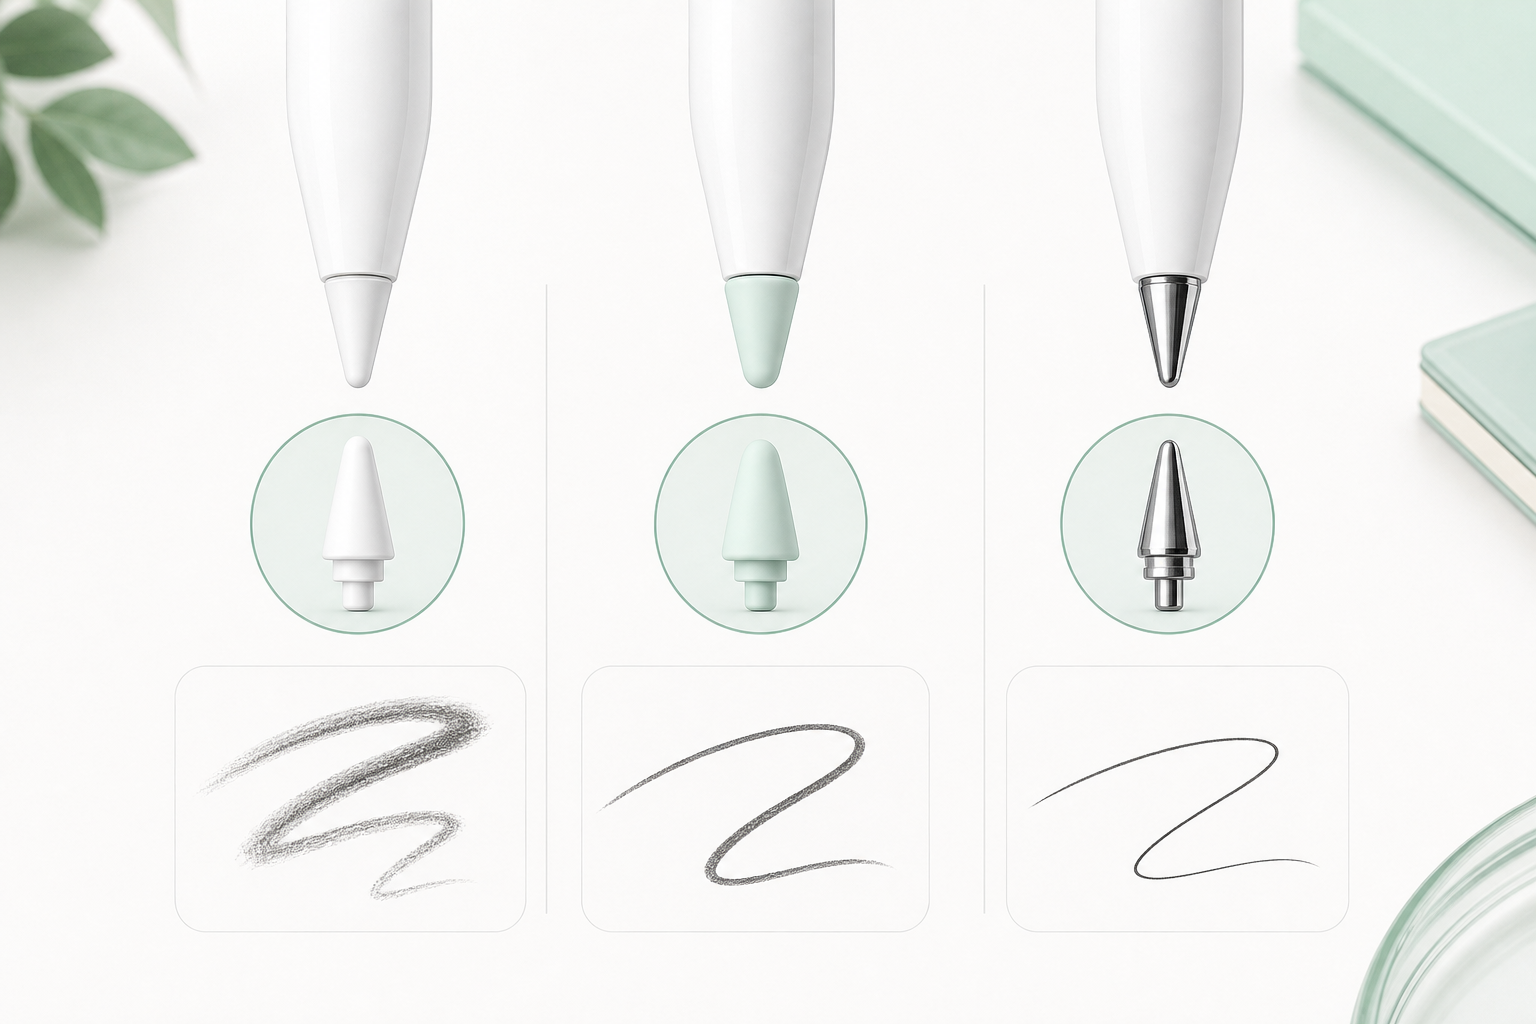
Comparison of Apple Pencil compatible tips for drawing and line control

Apple Pencil tips affect how your strokes feel on the iPad screen. The best option depends on your drawing style.

For Sketching

Choose a tip that gives you enough friction to control loose lines. A slightly softer feel can make sketching more comfortable.

For Clean Line Art

A more precise tip can help with controlled outlines, lettering, and detailed strokes.

For Coloring

Comfort matters more than sharp precision. Pick a tip that feels smooth during longer coloring sessions.

Posted on Leave a comment

Simple iPad Drawing Setup for Procreate Beginners

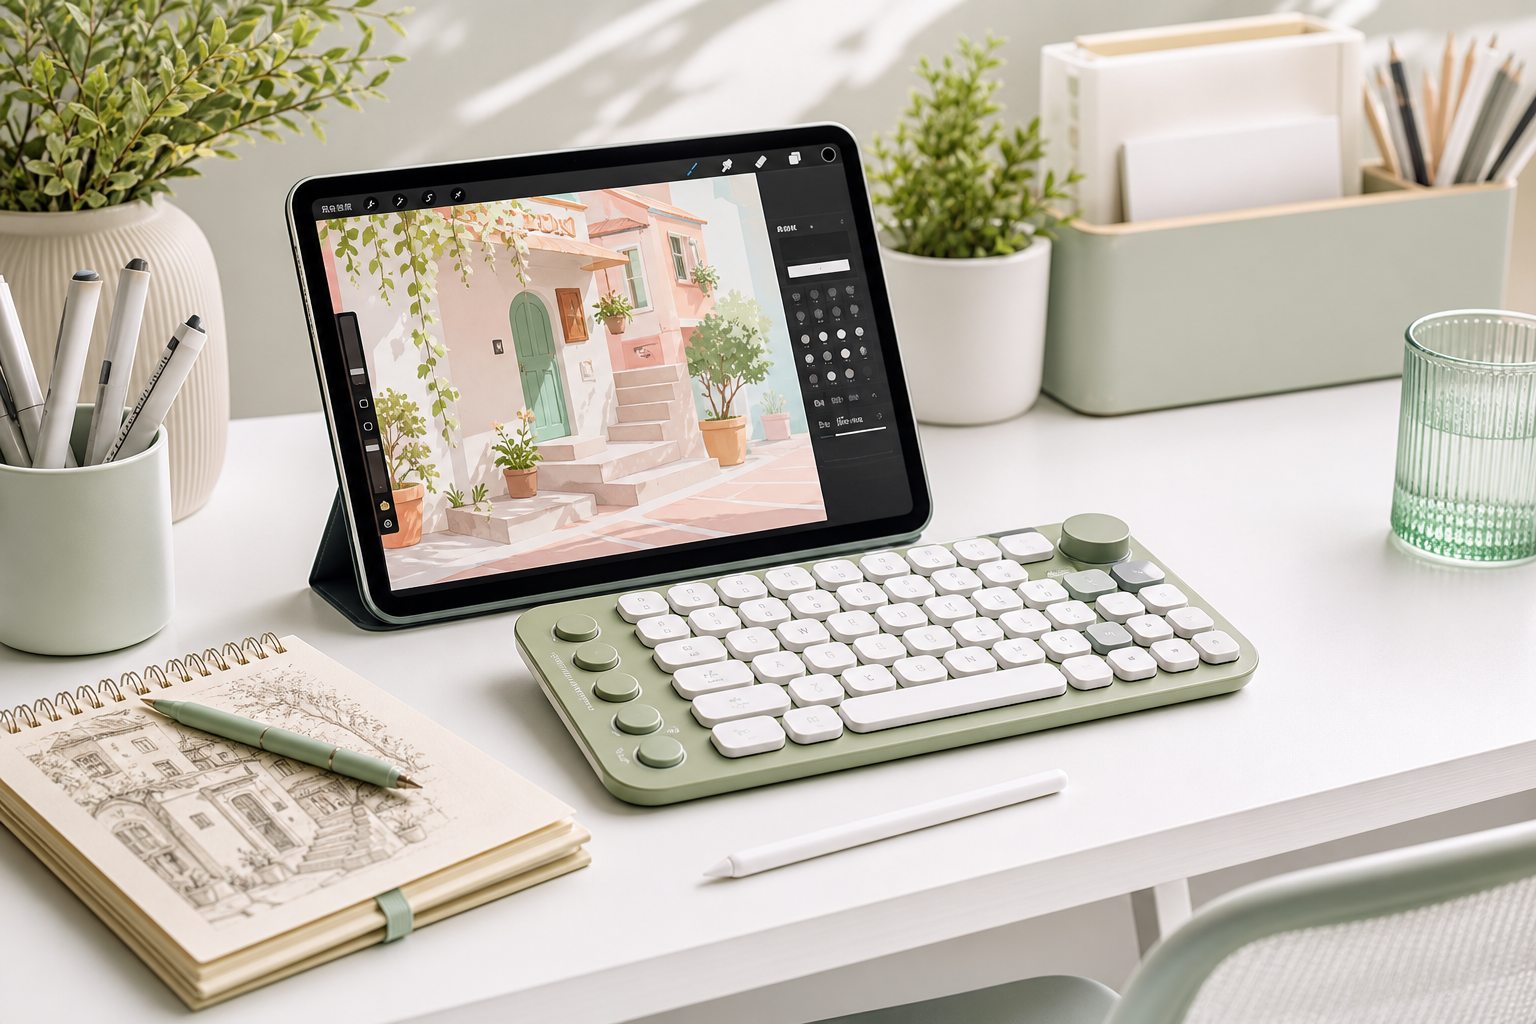
iPad Procreate drawing setup with shortcut keyboard and Apple Pencil

A good iPad drawing setup should reduce friction. You do not need a complicated desk. You need a comfortable angle, reliable tools, and fewer repeated taps.

1. Use a Comfortable iPad Angle

A stand helps keep your wrist relaxed and makes longer drawing sessions easier.

2. Keep Your Apple Pencil Ready

Keep extra tips or a charging stand nearby so drawing sessions do not stop unexpectedly.

3. Add Shortcuts When You Draw Often

A compact shortcut keyboard can speed up undo, redo, brush switching, and canvas control.

Posted on Leave a comment

Procreate Beginner Practice Plan: Week One

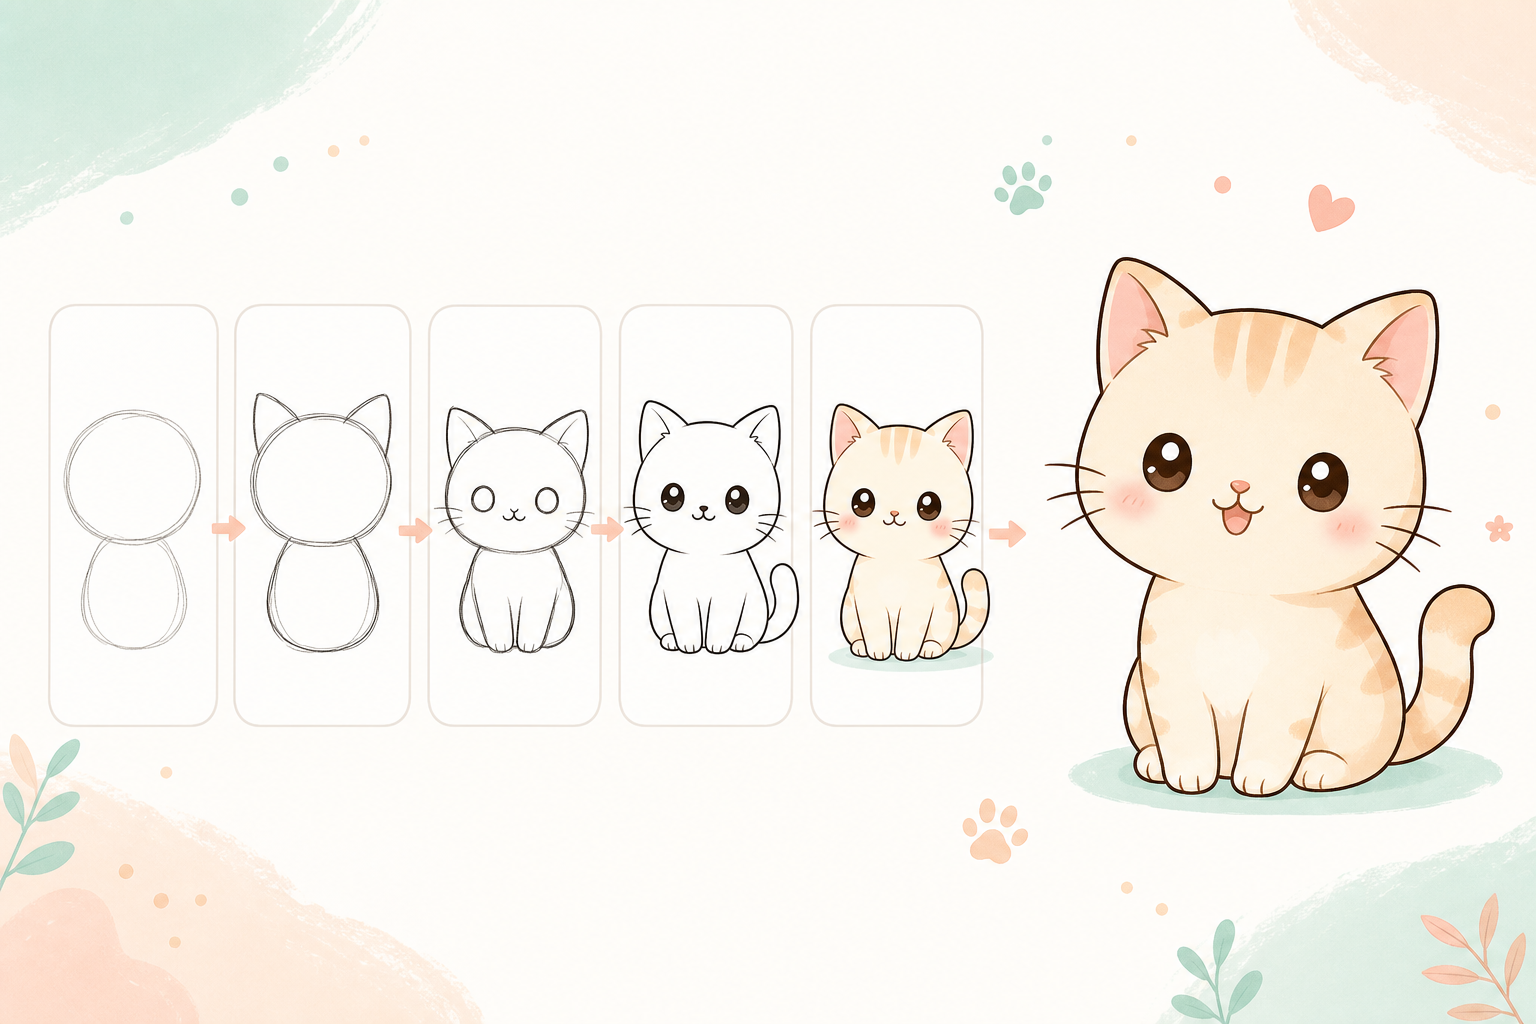
Step-by-step cute cat drawing tutorial in Procreate

This 7-day Procreate practice plan is designed for beginners. Each day has one small focus so you can build skill without feeling overwhelmed.

  • Day 1: Draw circles, ovals, and simple fruit shapes.
  • Day 2: Practice clean line art on one object.
  • Day 3: Color with flat base colors.
  • Day 4: Add soft shadows with a Multiply layer.
  • Day 5: Draw a cute animal using simple shapes.
  • Day 6: Paint fruit highlights and texture.
  • Day 7: Redraw your favorite subject and compare the result.

Keep each session short. Consistency matters more than one long practice day.

Posted on Leave a comment

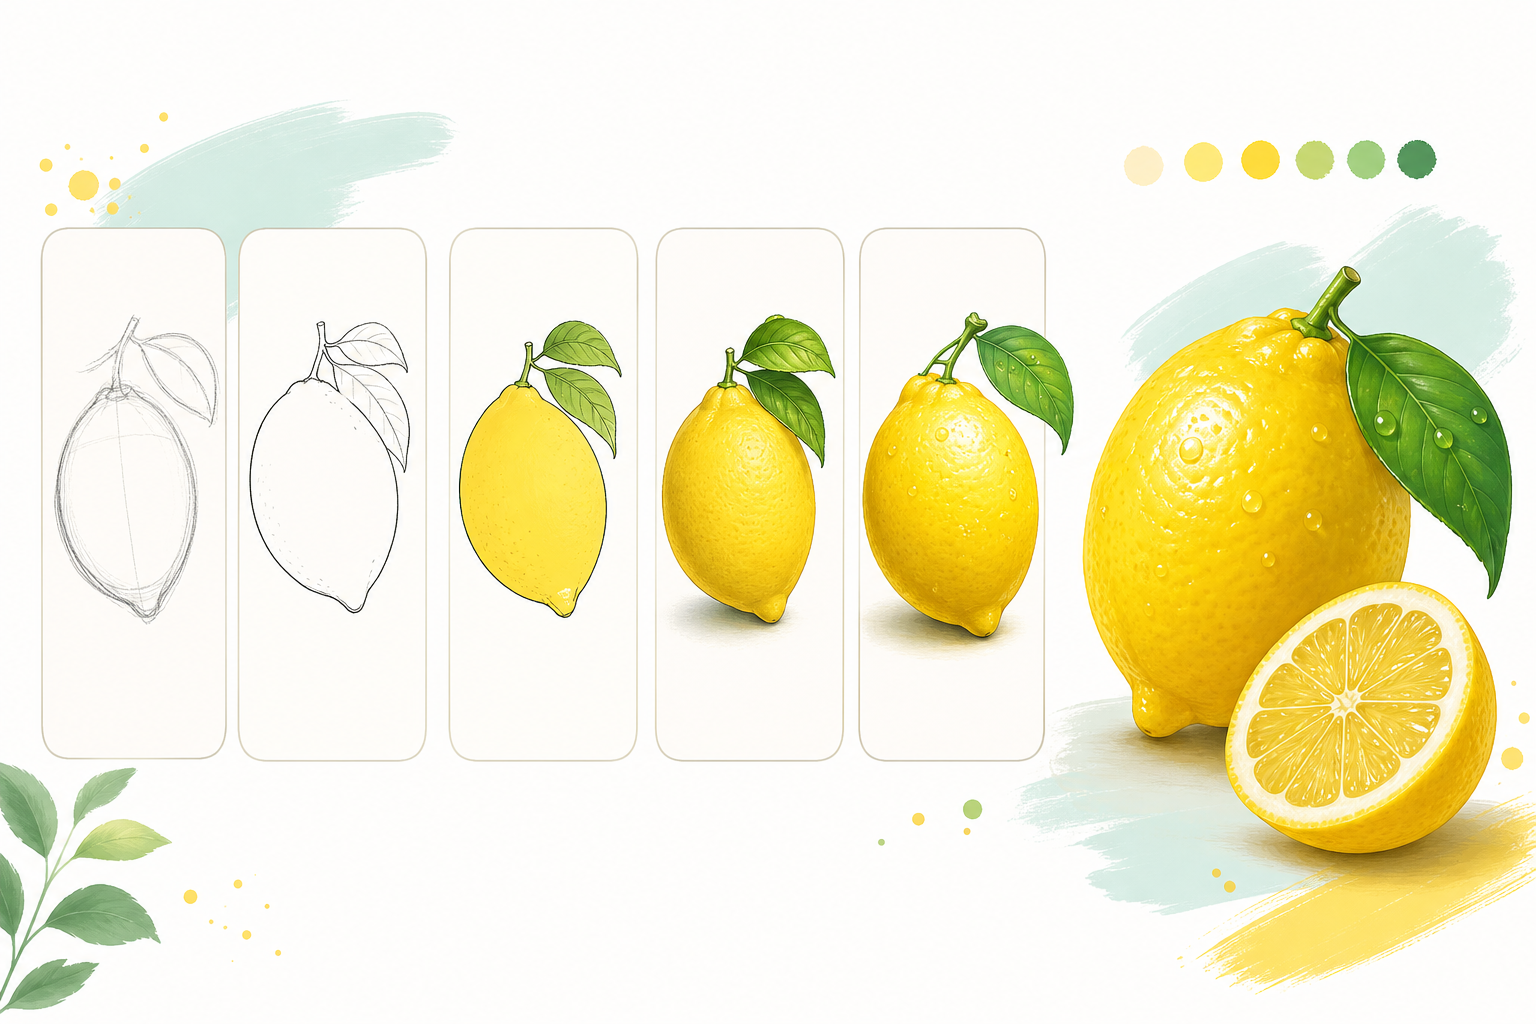
How to Draw a Lemon in Procreate

Step-by-step lemon drawing tutorial in Procreate

This beginner-friendly Procreate tutorial shows how to draw a lemon with simple shapes, soft color layers, and polished highlights. It is designed for iPad artists who want a fresh fruit illustration practice project.

Step 1: Sketch the Basic Shape

Start with a loose sketch. Keep the shape simple and avoid small details at this stage. Focus on the overall silhouette first.

Step 2: Clean the Outline

Create a new layer above the sketch and draw a cleaner outline. Use smooth, confident strokes so the fruit feels soft and natural.

Step 3: Add the Base Color

Place your color layer under the line art. Fill the fruit with bright yellow with warmer golden shadows. Keep the first color pass flat and simple.

Step 4: Paint Shadows and Gradients

Add a new layer for soft shadows. Use gentle gradients to make the fruit feel round. Build color slowly instead of using one heavy shadow.

Step 5: Add Details

Use tiny dots and soft speckles for the peel texture. Add a green leaf for contrast and a cut lemon slice if you want a fuller composition.

Step 6: Finish With Highlights

Add small bright highlights on the side facing the light. A few soft highlights can make the fruit look glossy and fresh.

Beginner tip: yellow can look flat quickly, so use warm orange shadows and pale cream highlights.

Drawing fruit is a great way to practice clean shapes, color control, and soft Procreate shading.

Posted on Leave a comment

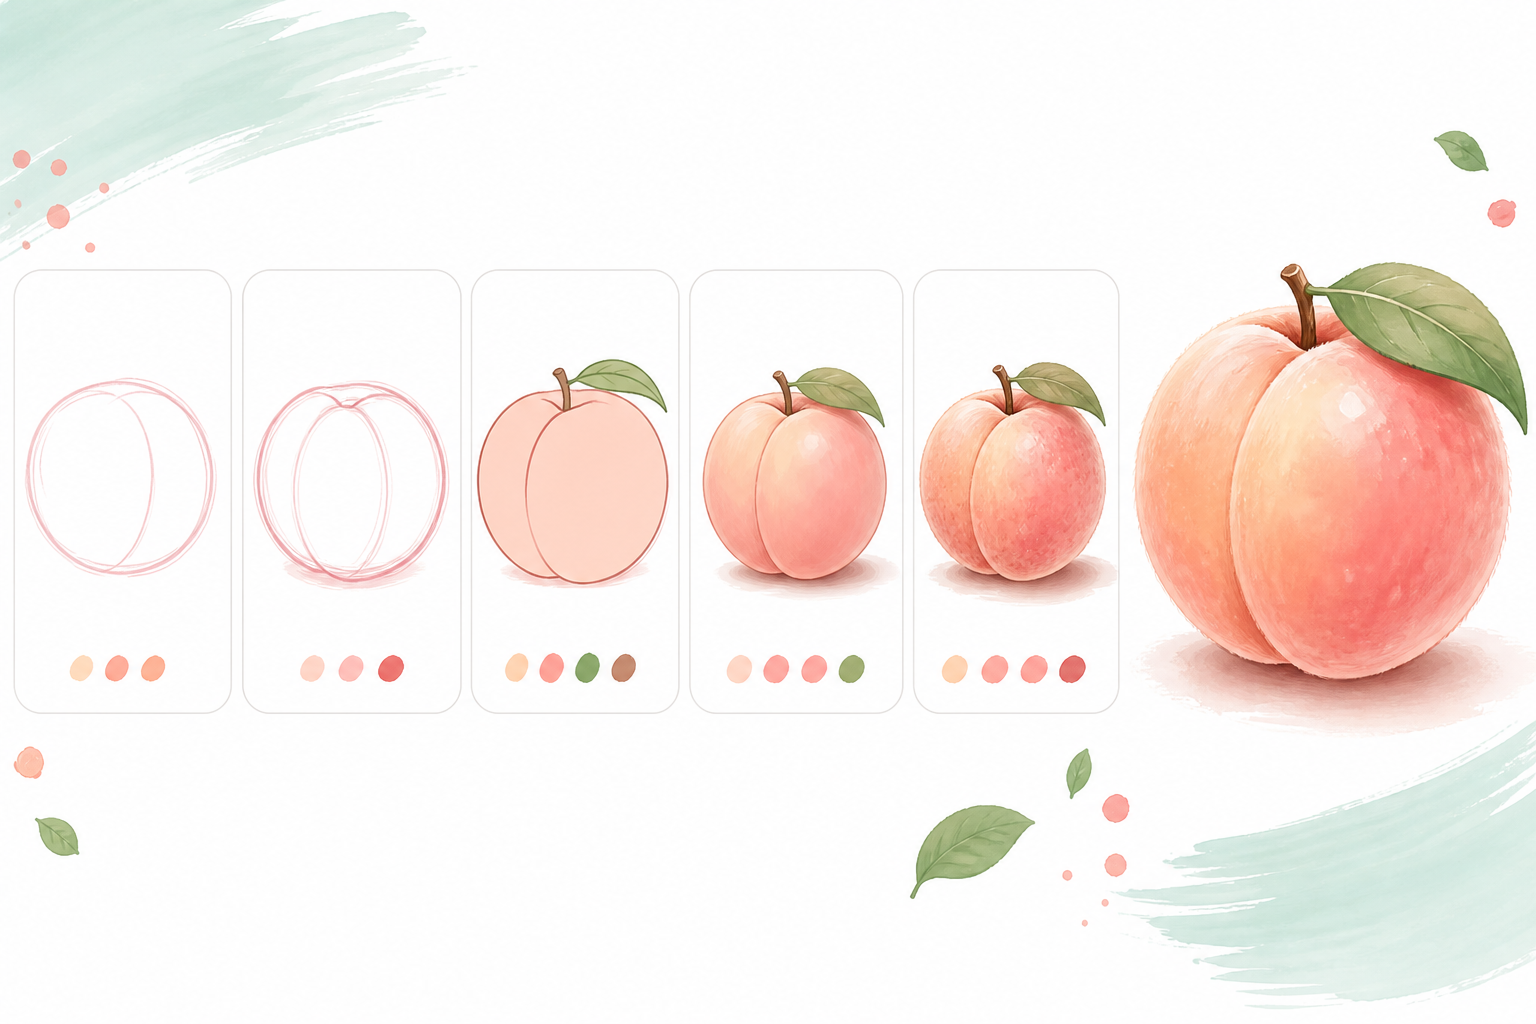
How to Draw a Peach in Procreate

Step-by-step peach drawing tutorial in Procreate

This beginner-friendly Procreate tutorial shows how to draw a peach with simple shapes, soft color layers, and polished highlights. It is designed for iPad artists who want a fresh fruit illustration practice project.

Step 1: Sketch the Basic Shape

Start with a loose sketch. Keep the shape simple and avoid small details at this stage. Focus on the overall silhouette first.

Step 2: Clean the Outline

Create a new layer above the sketch and draw a cleaner outline. Use smooth, confident strokes so the fruit feels soft and natural.

Step 3: Add the Base Color

Place your color layer under the line art. Fill the fruit with soft peach, coral, and warm orange tones. Keep the first color pass flat and simple.

Step 4: Paint Shadows and Gradients

Add a new layer for soft shadows. Use gentle gradients to make the fruit feel round. Build color slowly instead of using one heavy shadow.

Step 5: Add Details

Add the center groove with a soft darker line. Paint warm blush on one side and add subtle fuzzy texture with a low-opacity brush.

Step 6: Finish With Highlights

Add small bright highlights on the side facing the light. A few soft highlights can make the fruit look glossy and fresh.

Beginner tip: avoid hard shadows on a peach. Soft gradients make it feel more natural.

Drawing fruit is a great way to practice clean shapes, color control, and soft Procreate shading.

Posted on Leave a comment

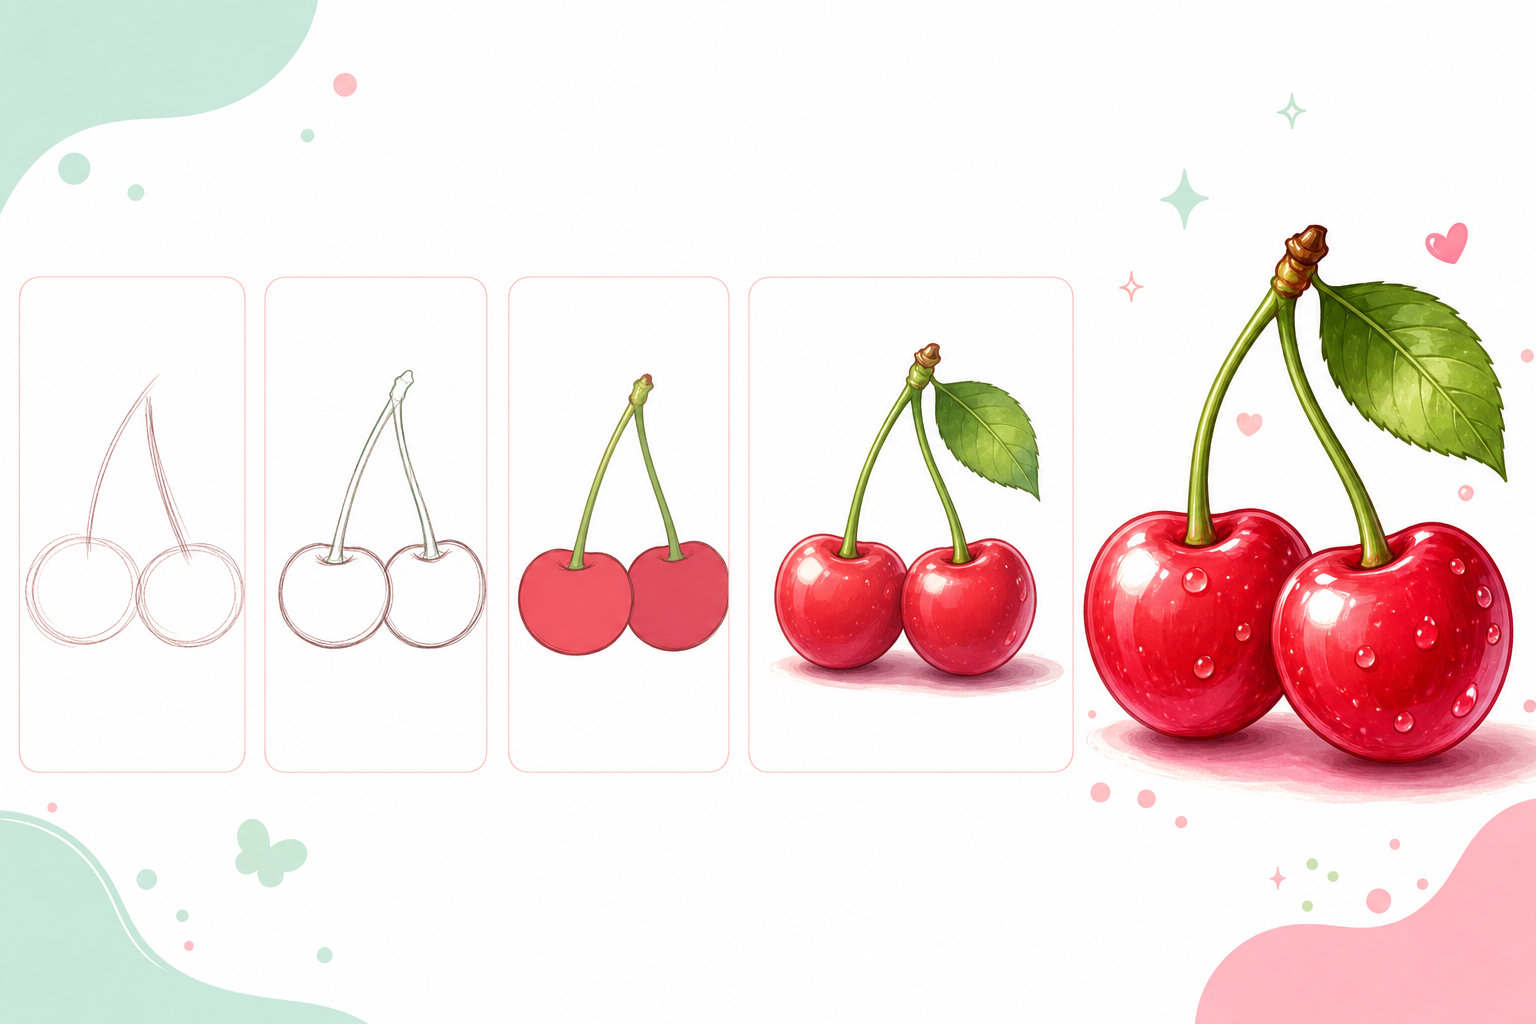
How to Draw Cherries in Procreate

Step-by-step cherries drawing tutorial in Procreate

This beginner-friendly Procreate tutorial shows how to draw a pair of cherries with simple shapes, soft color layers, and polished highlights. It is designed for iPad artists who want a fresh fruit illustration practice project.

Step 1: Sketch the Basic Shape

Start with a loose sketch. Keep the shape simple and avoid small details at this stage. Focus on the overall silhouette first.

Step 2: Clean the Outline

Create a new layer above the sketch and draw a cleaner outline. Use smooth, confident strokes so the fruit feels soft and natural.

Step 3: Add the Base Color

Place your color layer under the line art. Fill the fruit with deep pink-red or cherry red. Keep the first color pass flat and simple.

Step 4: Paint Shadows and Gradients

Add a new layer for soft shadows. Use gentle gradients to make the fruit feel round. Build color slowly instead of using one heavy shadow.

Step 5: Add Details

Draw two curved stems and one leaf. Add darker red near the bottom of each cherry, then paint bright highlight spots on the upper side.

Step 6: Finish With Highlights

Add small bright highlights on the side facing the light. A few soft highlights can make the fruit look glossy and fresh.

Beginner tip: cherries look shiny when the highlight is small, bright, and placed on the same side of both fruits.

Drawing fruit is a great way to practice clean shapes, color control, and soft Procreate shading.

Posted on Leave a comment

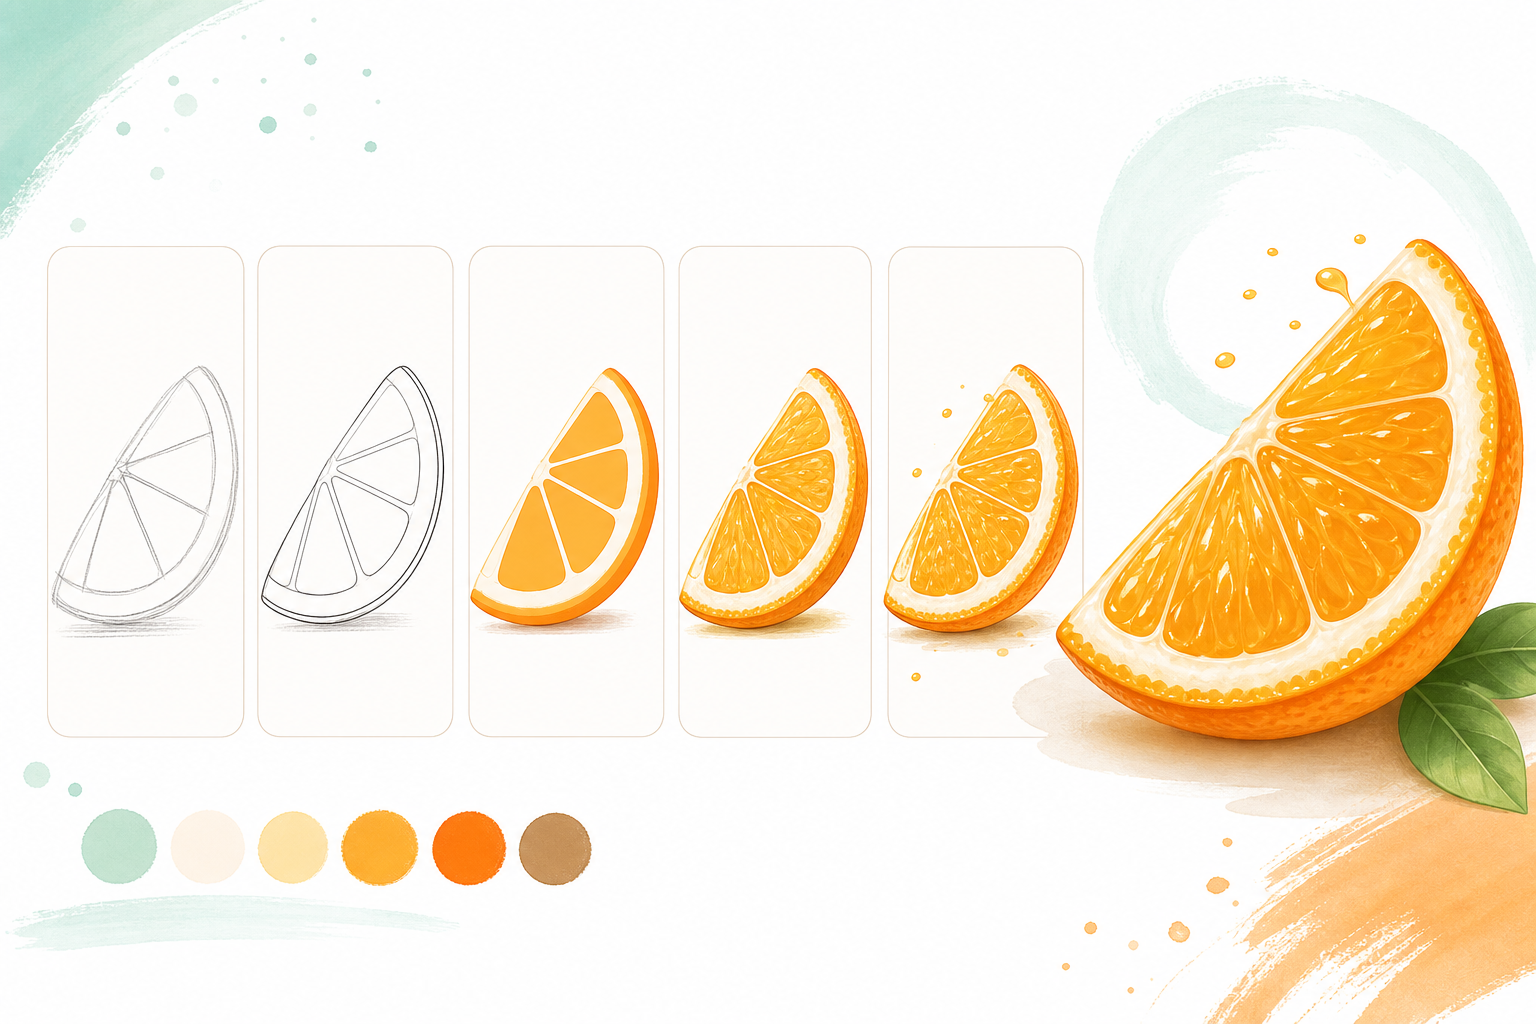
How to Draw an Orange Slice in Procreate

Step-by-step orange slice drawing tutorial in Procreate

This beginner-friendly Procreate tutorial shows how to draw a orange slice with simple shapes, soft color layers, and polished highlights. It is designed for iPad artists who want a fresh fruit illustration practice project.

Step 1: Sketch the Basic Shape

Start with a loose sketch. Keep the shape simple and avoid small details at this stage. Focus on the overall silhouette first.

Step 2: Clean the Outline

Create a new layer above the sketch and draw a cleaner outline. Use smooth, confident strokes so the fruit feels soft and natural.

Step 3: Add the Base Color

Place your color layer under the line art. Fill the fruit with light orange for the pulp and a deeper orange for the rind. Keep the first color pass flat and simple.

Step 4: Paint Shadows and Gradients

Add a new layer for soft shadows. Use gentle gradients to make the fruit feel round. Build color slowly instead of using one heavy shadow.

Step 5: Add Details

Separate the slice into small pulp sections. Add tiny dots and short strokes inside each segment to create a juicy texture.

Step 6: Finish With Highlights

Add small bright highlights on the side facing the light. A few soft highlights can make the fruit look glossy and fresh.

Beginner tip: keep the white rind visible. It makes the orange slice instantly easier to read.

Drawing fruit is a great way to practice clean shapes, color control, and soft Procreate shading.

Posted on Leave a comment

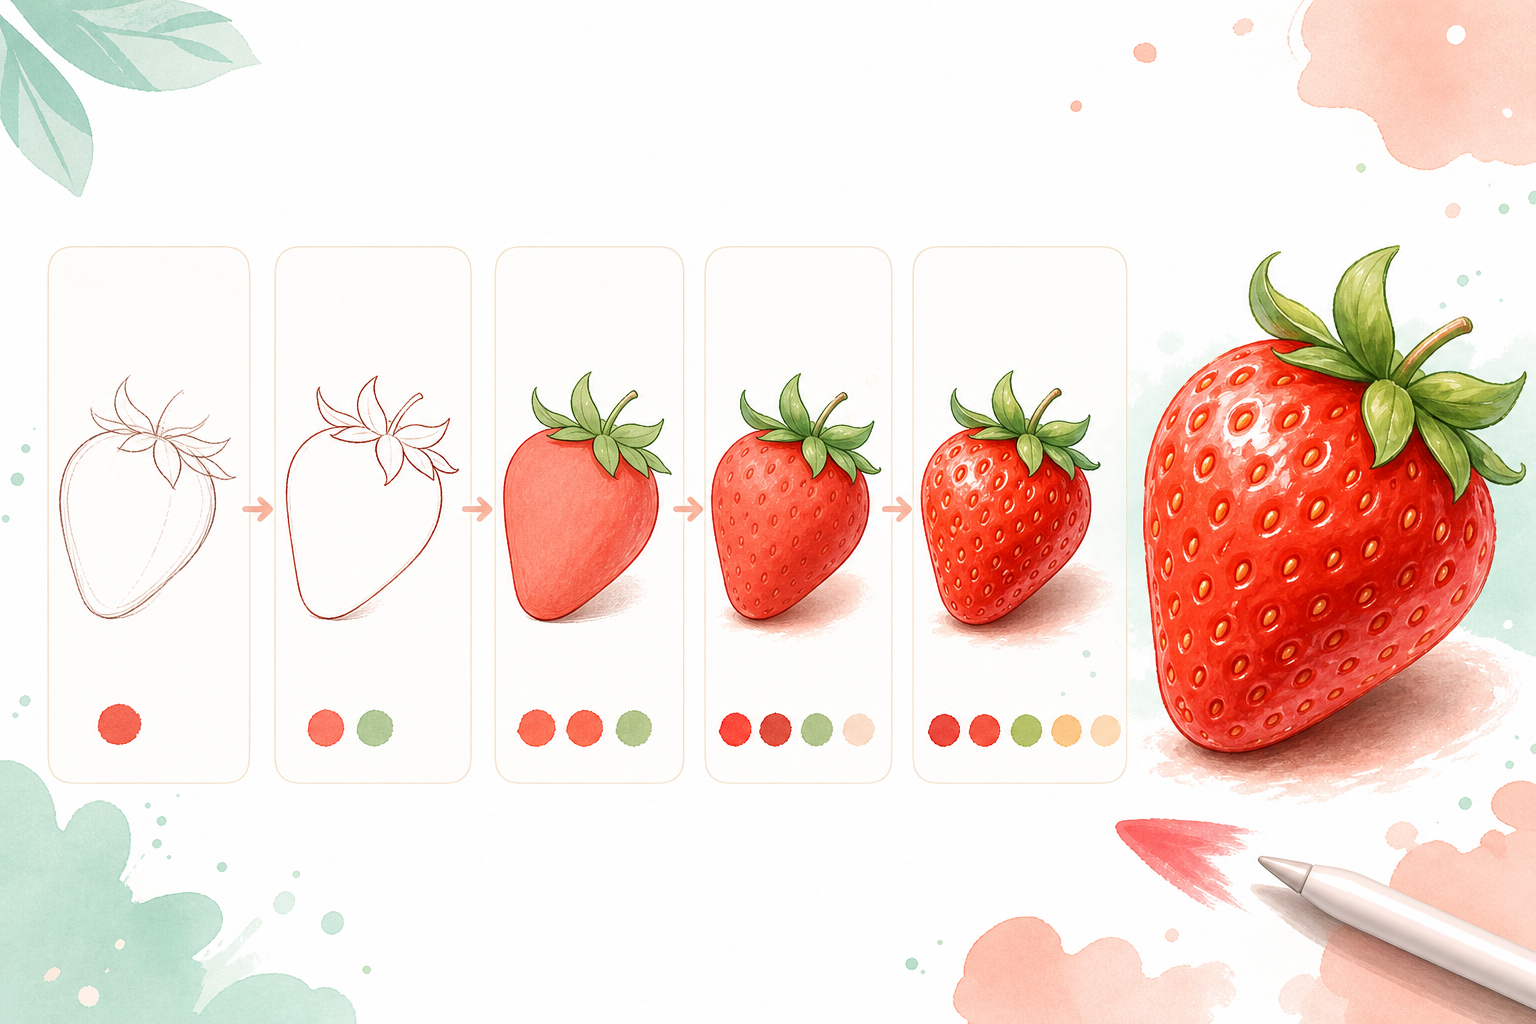
How to Draw a Strawberry in Procreate

Step-by-step strawberry drawing tutorial in Procreate

This beginner-friendly Procreate tutorial shows how to draw a strawberry with simple shapes, soft color layers, and polished highlights. It is designed for iPad artists who want a fresh fruit illustration practice project.

Step 1: Sketch the Basic Shape

Start with a loose sketch. Keep the shape simple and avoid small details at this stage. Focus on the overall silhouette first.

Step 2: Clean the Outline

Create a new layer above the sketch and draw a cleaner outline. Use smooth, confident strokes so the fruit feels soft and natural.

Step 3: Add the Base Color

Place your color layer under the line art. Fill the fruit with a warm red or coral red base. Keep the first color pass flat and simple.

Step 4: Paint Shadows and Gradients

Add a new layer for soft shadows. Use gentle gradients to make the fruit feel round. Build color slowly instead of using one heavy shadow.

Step 5: Add Details

Paint the green leaves first, then add small seed shapes across the strawberry. Use darker red near the edges and lighter red near the center.

Step 6: Finish With Highlights

Add small bright highlights on the side facing the light. A few soft highlights can make the fruit look glossy and fresh.

Beginner tip: place seeds along the curve of the strawberry so the fruit looks round, not flat.

Drawing fruit is a great way to practice clean shapes, color control, and soft Procreate shading.